Side Pannel
Chocolate Peanut Butter Cake Roll
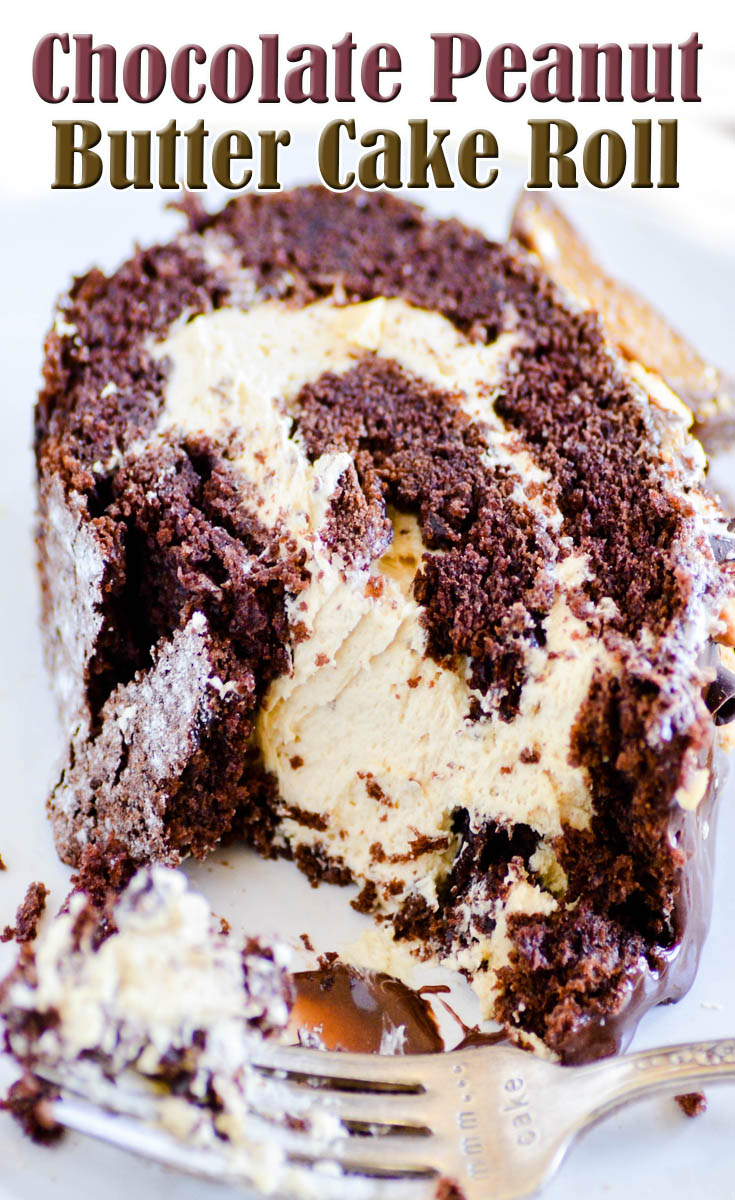
Chocolate Peanut Butter Cake Roll
- Recipe Submitted by maryjosh on 03/11/2019
Ingredients List
- FOR THE CAKE
- 15.25 ounce chocolate cake mix
- ½ cup water
- 3 eggs
- ½ cup (1 stick) butter, melted
- FOR THE WHIPPED PEANUT BUTTER FROSTING
- ½ cup peanut butter
- 12 tbsp butter, softened
- 1½ powdered sugar
- ⅓ cup Cool Whip
- ADDITIONAL
- chocolate ganache (half of this recipe is plenty)
- flour for dusting
- peanut butter cups for topping
Directions
Preheat oven to 375ºF.
MAKE THE CAKE
Whisk together the cake mix, water, eggs, and melted butter.
Line a 10x15 jelly roll pan with foil or parchment paper and lightly grease with nonstick cooking spray.
Spread the batter in the lined pan and bake for 15 minutes.
ROLL THE CAKE
Immediately after removing from the oven, invert the cake onto a stack of 3 paper towels stacked on top of each other dusted with flour (I found that 3 sections wide was the perfect length). Peel the foil or parchment from the back of the cake.
Start at the short end and gently roll up the paper towels and the cake together (see photos in post). Place on the counter to cool at room temperature, seam side down. If necessary, place something alongside the cake to prevent it from unrolling.
MAKE THE FROSTING
Use an electric mixer to whisk together the butter and peanut butter until combined.
Mix in the powdered sugar ½ cup at a time, whisking in between each addition until smooth and scraping down the sides as needed.
Whisk in the Cool Whip.
ASSEMBLY
Gently unroll the cake (leave it on the paper towel).
Spread the frosting on the cake and gently re-roll (without the paper towel).
Carefully transfer the cake roll onto a long piece of plastic wrap. Wrap the roll in plastic wrap as tightly as possible, using multiple pieces of plastic wrap if needed.
Place the cake roll in the refrigerator for 30 minutes.
Once chilled, unwrap and spread the ganache on top. Add chopped peanut butter cups if desired. Keep chilled until ready to serve.
You may want to cut off the ends for a cleaner presentation when serving.
Tweet

Recipes by Course
Recipes by Main Ingredient
Recipes by Cuisine
Recipes by Preparation
Recipes by Occasion
Recipes by Dietary


Who loves our Healthy Recipes?

Quick Links
Main Ingredient
Preparation
- Copyright © 2016, CompleteRecipes.com
- Terms of Service
- /
- Privacy
